In Previous post, we explored how to created Placeholder Datastore. Now we are going to Configure Protected Groups in VMware SRM.
Protection group is a collection of virtual machines that Site Recovery Manager protects together. Let’s take an example you have any specific set of Virtual machines i;e App VMs, DB VMs. You can group them together in Protected Group. In Array based replication, when you create Protection group, you group the virtual machines on the basis of replicated datastores. When you create protection group, you group specific datastores to that protection group. And migration all Virtual machine to those datastores which is part of Protection groups. Make sure that datastores are replicated to recovery site.
You can include one or more protection groups in a recovery plan. A recovery plan specifies how Site Recovery Manager recovers the virtual machines in the protection groups that it contains.We will see this in next article.
Let’s jump to the Step by Step guide to Create Protection Group. Here I am create only one Protection group. You can create many depending on your requirement.
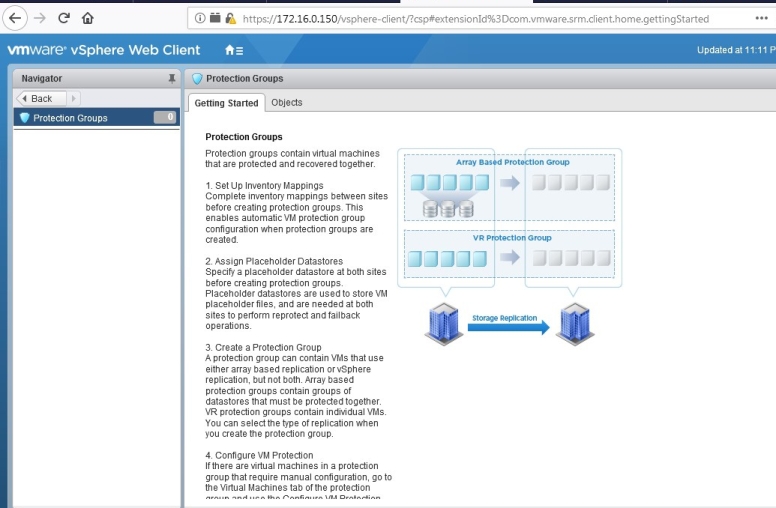
- Login to Site Recovery Manager console. vCenter Server > Home > Site Recovery
- Click on Protected Groups.
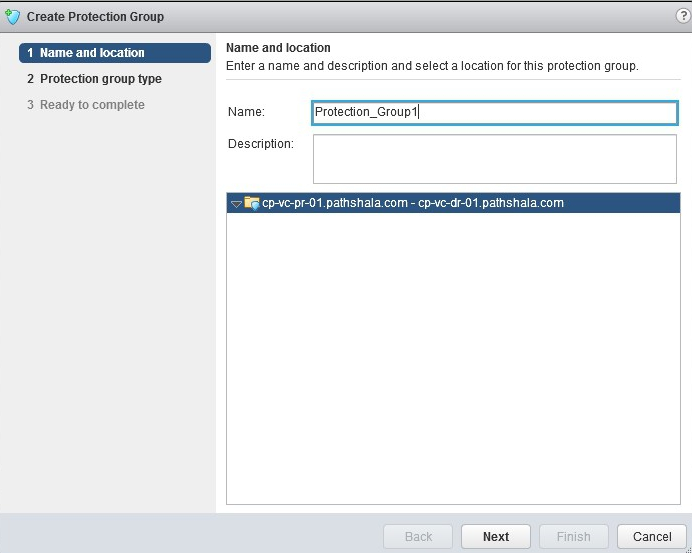
- Go to Objects tab and Click on Create Protection Group.

- Give a name to Protection Group.
- Select the protected site and protection group type.
- Select Array Pair and Click on Next.

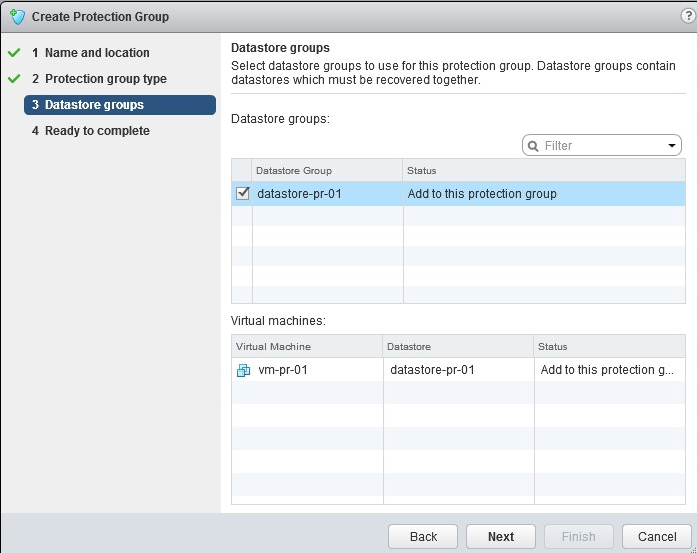
- Select Datastores you want to add to this Protection Group. You can choose multiple datastores in one Protection group. Click on Next.
- Review your settings and Click on Finish.

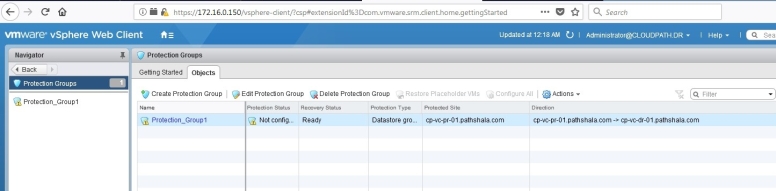
- Protection Group has been created. Review it under Objects tab.
That’s all from this article. We are moving to next article which is to create Recovery Plan in VMware SRM. Stay Connected.
Take a look in below topics, explore and learn Site Recovery Manager: –
-
Learn SRM – Part 1 – Introduction of VMware Site Recovery Manager 8.1
-
Learn SRM – Part 2 – Understand VMware Site Recovery Manager Licensing
-
Learn SRM – Part 3 – Understand Minimum Requirement for SRM in your Home Lab
-
Learn SRM – Part 4 – Prepare for Replicated Storage in you Home Lab (Ignore this step in Real Environment. You need to interact with Storage team for all these tasks in real environment)
-
Learn SRM – Part 4.1 – Deploy HP VSA in Both Site
-
Learn SRM – Part 4.2 -Configure HP VSA Appliance Networking in both Site
-
Learn SRM – Part 4.3 -Install HP CMC Management Console
-
Learn SRM – Part 4.4 -Add Appliance in HP CMC
-
Learn SRM – Part 4.5 -Create Management Group in HP VSA
-
Learn SRM – Part 4.6 -Create Cluster and Volumes in HP VSA
-
Learn SRM – Part 4.7 -Find and Add ISCSI Initiator in ESXi Host
-
Learn SRM – Part 4.8 -Assign Volume to ESXi Host
-
Learn SRM – Part 4.9 -Scheduling Array Based Replication
-
-
Learn SRM – Part 5 – Install VMware Site Recovery Manager 8.1 (SRM)
-
Learn SRM – Part 6 – Install SRA (Storage Replication Adapter)
-
Learn SRM – Part 7 – Configure Site Pairing for both Protected and Recovery Site
-
Learn SRM – Part 8 – Configure SRM Array Manager Pairing
-
Learn SRM – Part 9 – Configure Resource Mapping in VMware SRM
-
Learn SRM – Part 10 – Create Placeholder Datastore in VMware SRM
-
Learn SRM – Part 11 – Configure Protected Groups in VMware SRM
-
Learn SRM – Part 12 – Configure Recovery Plans in VMware SRM
-
Learn SRM – Part 13 – Perform Test Drill using VMware SRM
-
Learn SRM – Part 14 – Perform Cleanup Activity in VMware SRM
-
Learn SRM – Part 15 – Perform Cleanup Activity in VMware SRM
